
The Options Menu Guide
This guide introduces you to the options menu of Seismovision 3. Explaining all available Seismovision options for Tip of the Day, mIRC auto-away, config management, game management and update.
1. Open Seismovision 3
Double click on the Seismovision icon on the desktop. There are many ways to open Seismovision, this is not covered in this guide.
2. Open Options Menu

Click on 'Options' to open the options menu.
3. Basic Layout
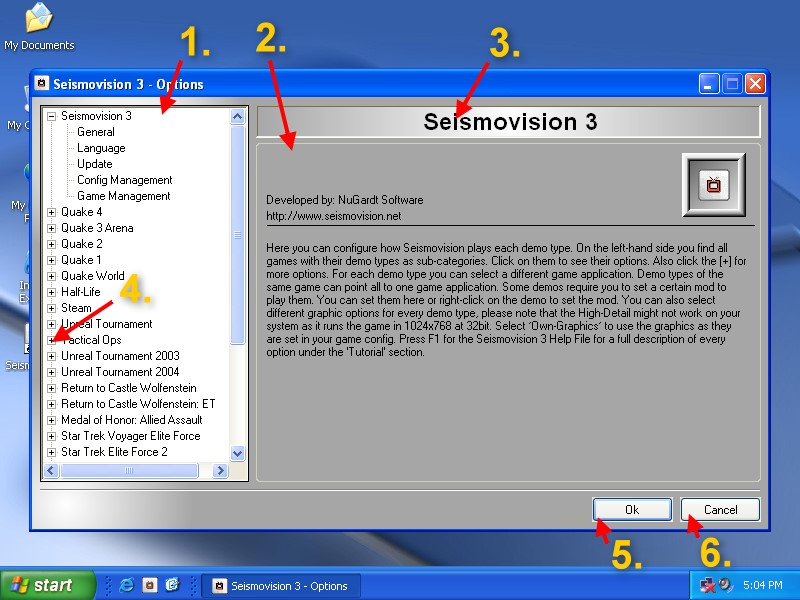
1 - Selection Tree
Here you can select what options you
want to configure. Click on a item to view it.
2 - Configuration Panel
This is where the actual options
can be chosen.
3 - Configuration Screen Title
Displays the title of the
configuration panel.
4 - Expansion Node
You can click the boxed plus
sign to expand the node to reveal more options. Use the boxed minus sign to hide
the options again.
5 - Save and Close Options
Saves all changes and
closes the options menu. The save procedure may take a couple of seconds if many
changes where done.
6 - Reject changes and Close Options
Rejects all changes done since opening and closes the
options menu.
4. General Options
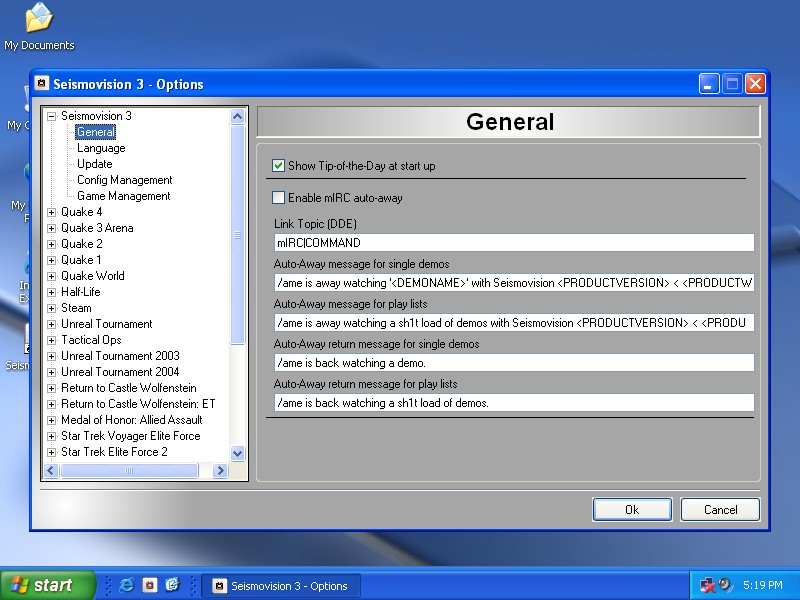
Under general options you can set up to enable or disable Tips of the Day and mIRC auto-away. Tips of the Day display little hints, tricks and other useful information upon start up of Seismovision. These tips do not appear when playing a demo directly. To use mIRC auto-away you need to have mIRC installed and active, you can download it at http://www.mirc.com. In Seismovision 3 you will have to setup the Link Topic (DDE). By default it is set to the mIRC default. When watching a demo, mIRC auto-away can send a message to all IRC (Internet Relay Chat) channels you are currently on to show your friends you are busy watching a demo and cannot respond. You can change these lines to anything you like and mIRC understands.
There are also some constants for the mIRC lines:
<PRODUCTVERSION>
Displays the Seismovision version number. Such as 'v3.00'.
<PRODUCTWEBSITE>
Displays the Seismovision web-site address 'http://www.seismovision.net'
<DEMONAME>
Displays the name of the demo, does not apply to play lists.
<AUTHOR>
Displays the name of the author 'Kevin 'OomJan' Gardthausen, MCP'.
5. Language Options
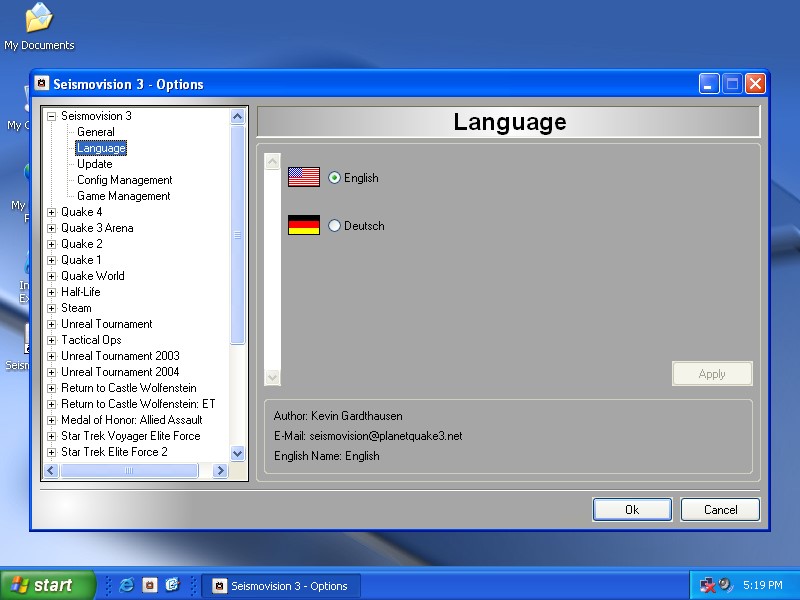
All languages currently available are listed here. Click the option button next to the flag to select a language and click 'Apply'. Seismovision loads and applies the language. You are automatically dropped to the options default screen.
6. Update Options
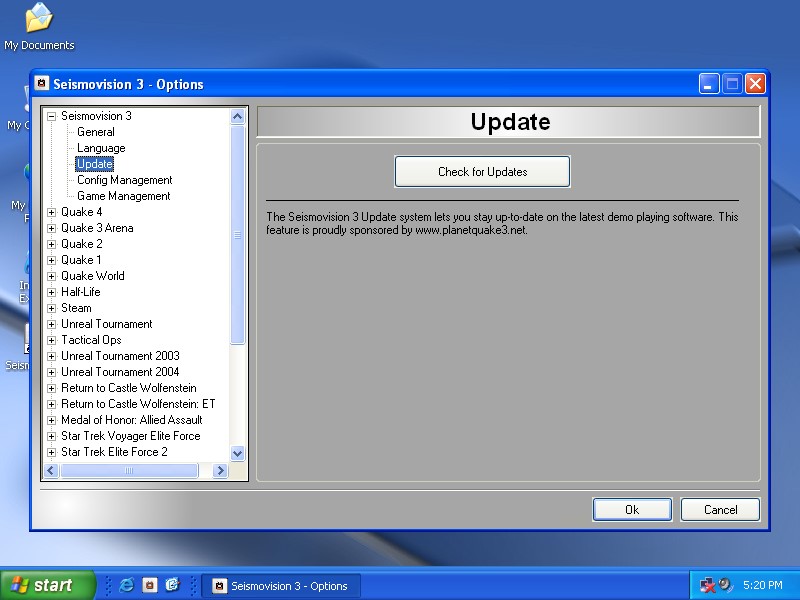
Click on 'Check for Update' to launch the Update System. This feature is only available to registered users. Seismovision will remain open during the update phase and will only close when it has to. The update system is explained in detail in another tutorial.
7. Config Management
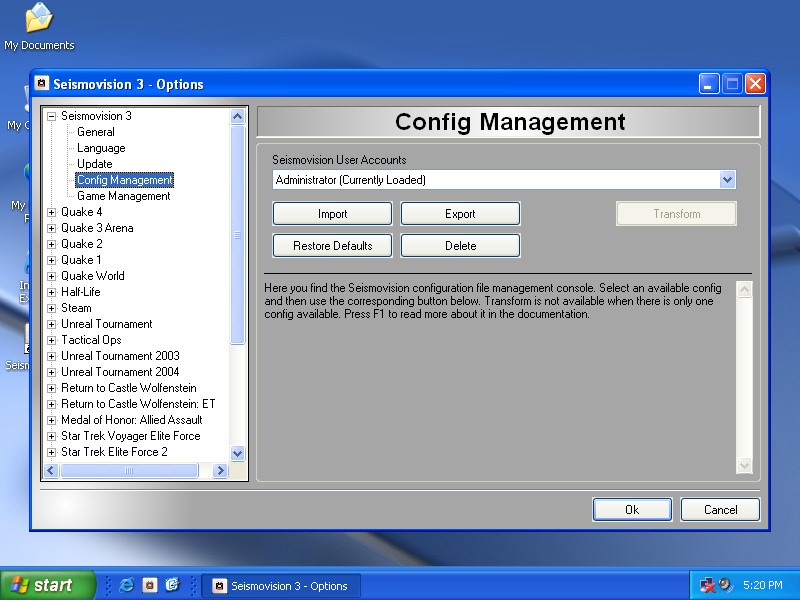
Here can export and import your Seismovision settings. All existing Seismovision configs are listed. The names of the configs are the names of the Windows user account where Seismovision was at least once used. 'Export' lets you save the selected Seismovision config to your hard drive or data medium. The 'Import' button lets you transfer the config back into Seismovision. It will be imported for the currently loaded config and not the selected config. 'Delete' remove the config and Seismovision closes afterwards only when deleting the currently loaded config. 'Restore Defaults' resets all setting in the config. The 'Transform' button is not yet available and will be in a later version.
Customized game configs or game configs created with the config editor cannot be imported or exported here.
8. Game Management

Click on 'Game Management' to launch the game selection panel.
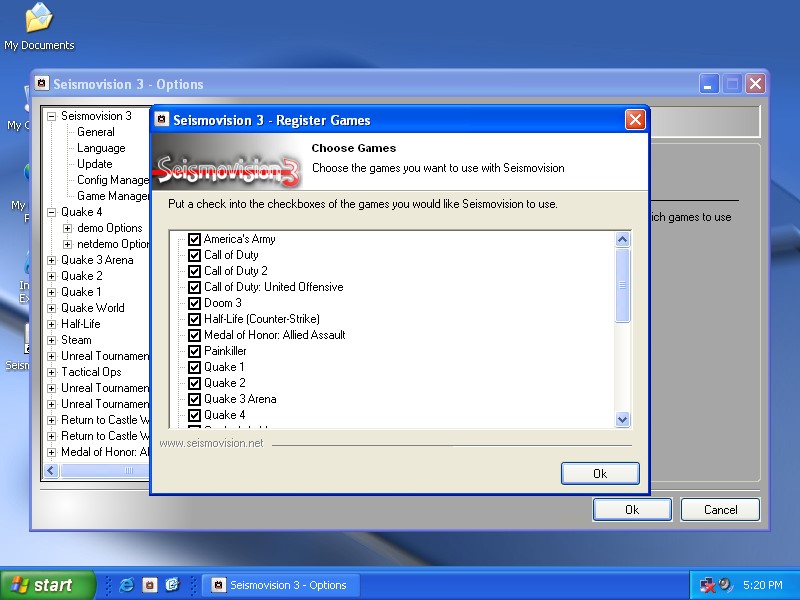
As you have seen during the installation this is the same panel. Put a check mark into the box next to the game name to select it or deselect it to remove. Only selected games will be listed in the options and have file associations. When another demo player or program took over a file association, simple click 'Ok' and all associations are renewed. After clicking 'Ok', Seismovision will refresh its interface to show the changes.
9. Basic Game Setup
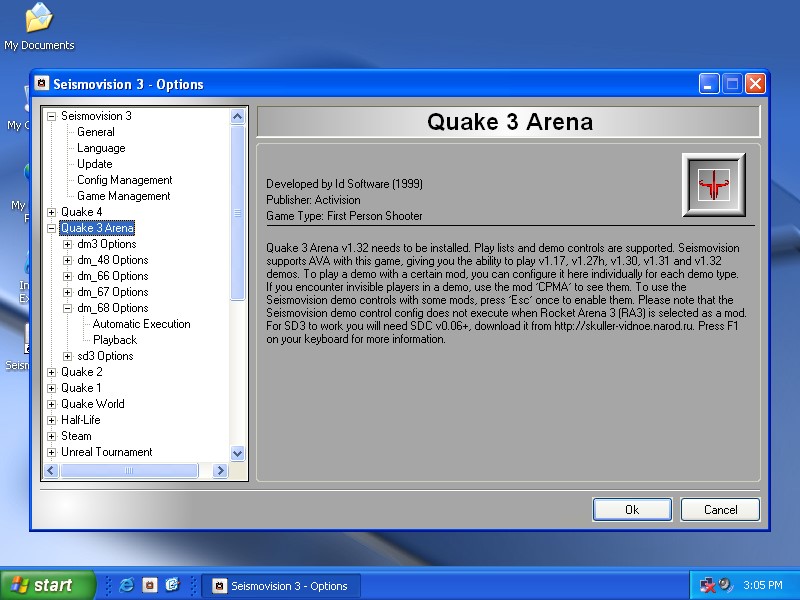
Every game is an introductory screen giving you some important information about the game such as abilities or special precautions. Choose the sub-options to configure.
9.1 Demo Type Options
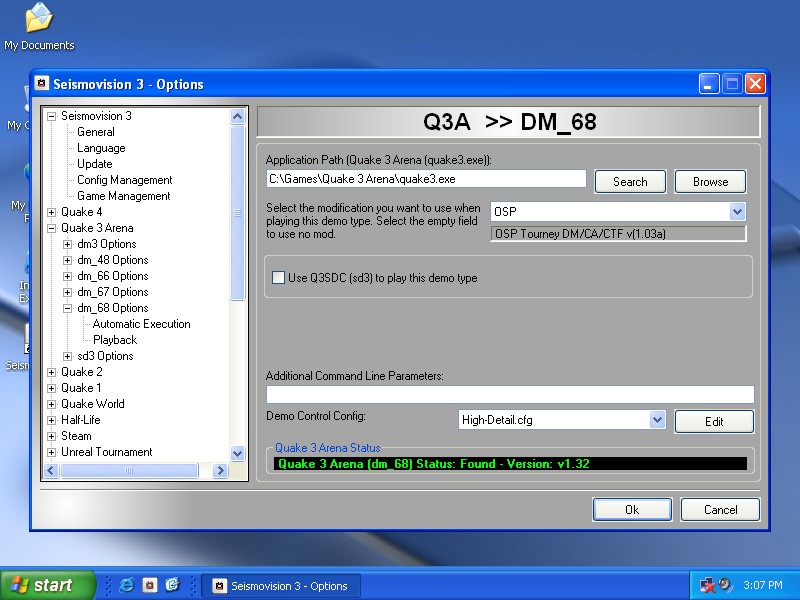
Each demo type for a game has to be configured independently. On top of the config panel you must enter the correct path to the game. You can either type a path manually, let Seismovision smart search or browse to it. When using 'Search', Seismovision provides a possible list of matches you can choose from and click 'Ok'. Some games are detected in less than a second. When a valid game path has been chosen, a note is displayed at the bottom of the panel showing its state. Green means that the game path is correct. Red means its not valid. Yellow simply means it is not configured.
Below the game path you can select a default playing mod. Some demos can only be played back in the mod they where recorded in. This field is shown for most games but not all.
Below the mod options you will mostly find special options. With Quake 3 Arena for example you can choose Q3SDC to play the demo. Unreal Tournament has playback flags here that influence how the demo is played. To get more information for a game, simply press F1 on your keyboard and the help file will open the game's help page.
At the bottom of the panel you see 'Additional Command Line Parameters'. This is for advanced users only who want to enable certain game settings.
Below that we find the config selection box and 'Edit' button. Here you can select a config for demo playback. Configs provide demo controls and graphic settings. For some games, multiple configs are available. Select a config and press the 'Edit' button to open the config in your default test editor (probably Notepad). This is for advanced users only.
9.1 Automatic Execution
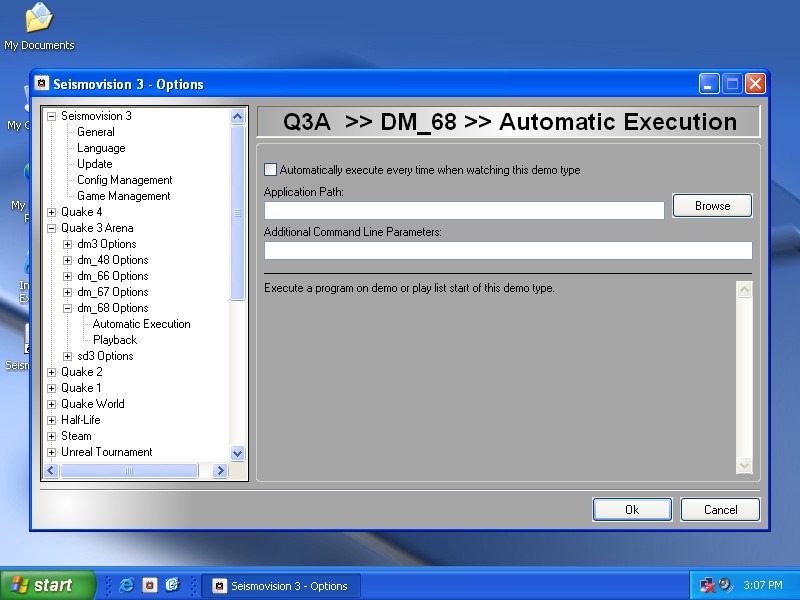
Launch an external program when playing this demo type. You must not put the game path in here. Choose only small programs like WinAmp. Some programs will interrupt demo play. 'Browse' to a program and select it. Setup command line parameters if any and check the 'Automatically execute every time when watching this demo type' check box.
9.2 Playback

Choose the playback options for single demos and play lists. Not all games have this option. Some games even have benchmark modes. Click on the dropdown arrow to view the available options.
This concludes the options menu guide.