Making a Movie of Demos
This guide tries to introduce you to making your own movie from demo clips. The process of capturing and making of clips is explained here. The use of video editors is not explained. This guide is not for beginners, you should have decent knowledge on how to use Windows Explorer and copying files. We use Quake 3 Arena as example in this guide, the process for other games is very similar.
This guide does not apply to all games. Quake 3 Arena, Call of Duty, Call of Duty: United Offensive, Call of Duty 2, Star Trek Voyager Elite Force, Star Trek Elite Force, Return to Castle Wolfenstein, Return to Castle Wolfenstein: Enemy Territory and Soldier of Fortune 2 work in a similar way. Use www.google.com for finding more tutorials.
1. Preparation
First of all we have to make sure that we have got everything stated above otherwise we might have problems later on. In the next step we prepare the game for our recording frenzy.
2. Cleaning Up
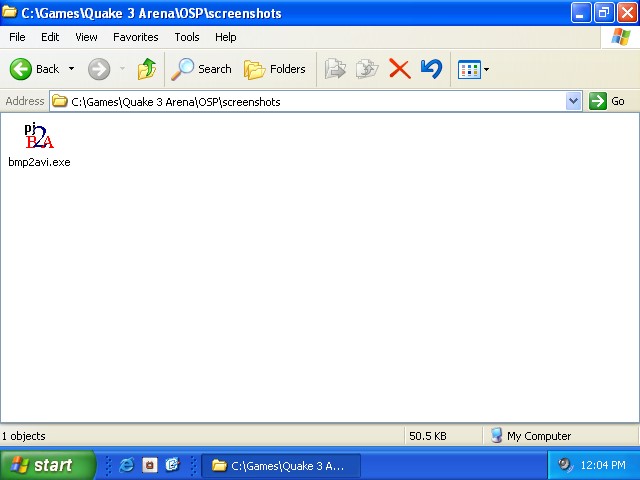
When we do our recording, all frames are saved as screenshots on the screenshot directory of the game. The space we need for this depends on the length of the recording. I recommend having at least 5 Gigabyte free. Go the screenshot directory of the game. When using a mod to record, you will find the screenshot directory in the directory of the mod. Example 'C:\Games\Quake 3 Arena\baseq3\screenshots' or 'C:\Games\Quake 3 Arena\osp\screenshots'. The position of the screenshot directory is similar in all the games. When found, transfer or clear out all the data. If the screenshot directory does not exist, create it. Inside the empty screenshot directory we place the program bmp2avi.exe.
Once all this done, we have to setup Seismovision and make some adjustments to the movie config.
3. Setting Seismovision Up for Recording
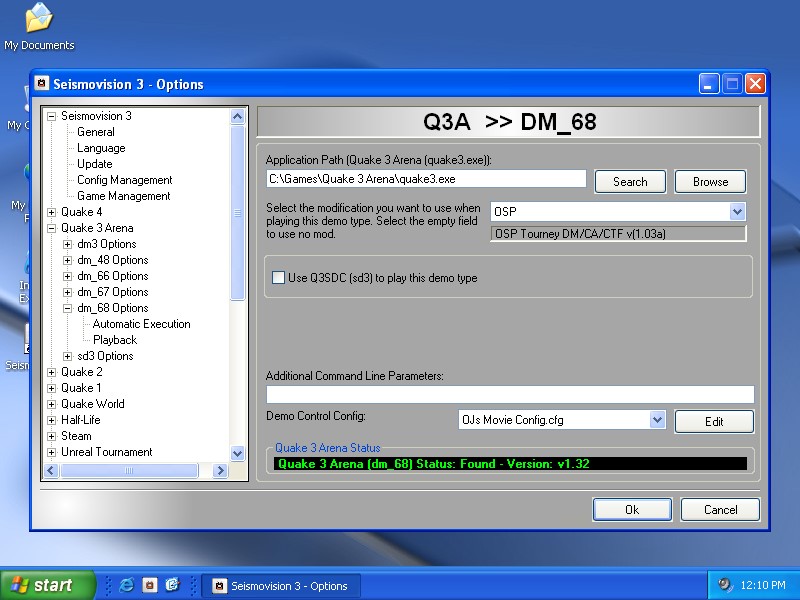
Open the options screen for the demo type you want to record. Select the right mod and select 'OJs Movie Config.cfg' from the demo control combo box. To make modifications to the movie config, click 'Edit'. By default the config is setup to record at 25fps. Recording resolution is at 640x480 at maximum detail of the game.
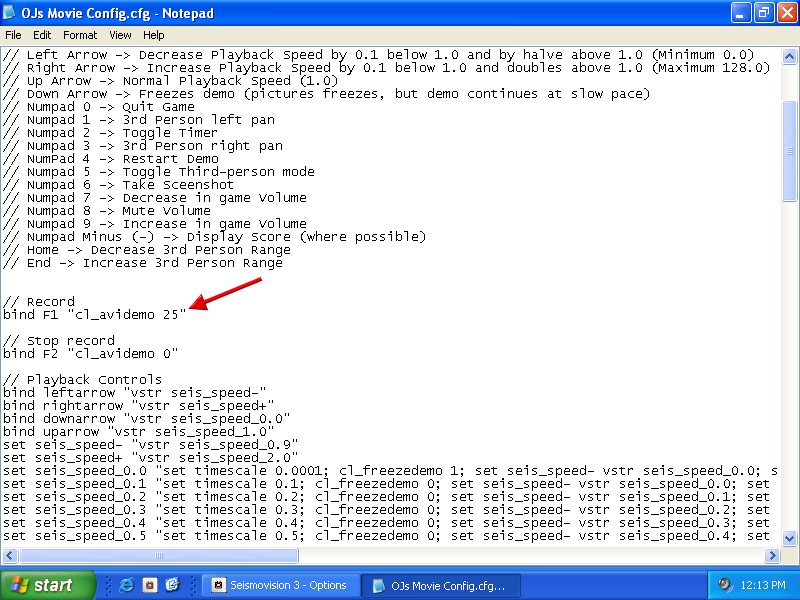
To change the recording frame it find the line 'bind F1 "cl_avidemo 25"'. Change the '25' to the frame rate you want (eg. '29.97'). At the bottom of the config you will find the graphics control, adjust as required. Anything not defined in the movie config will be taken from your own config. If you do not know what the lines mean, leave it in peace. Close the config and save. Close Seismovision by clicking 'Ok' and then 'Close'. We are almost ready to start the recording session.
4. Home Work
The OJ's Movie Config does not report the action being done as the other configs to. (eg. 'Timescale: 4.0'). That is why we have to learn the config by heart, or at least the controls we need. The controls you can see below, you might want to print this part out.
| F1 | Records at 25 frames per second |
| F2 | Stops Recording |
| Left Arrow | Decrease Playback Speed by 0.1 below 1.0 and by halve above 1.0 (Minimum 0.0) |
| Right Arrow | Increase Playback Speed by 0.1 below 1.0 and doubles above 1.0 (Maximum 128.0) |
| Up Arrow | Normal Playback Speed (1.0) |
| Down Arrow | Freezes demo (pictures freezes, but demo continues at slow pace) |
| Numpad 0 | Quit Game |
| Numpad 1 | 3rd Person left pan |
| Numpad 2 | Toggle Timer |
| Numpad 3 | 3rd Person right pan |
| NumPad 4 | Restart Demo |
| Numpad 5 | Toggle Third-person mode |
| Numpad 6 | Take Sceenshot |
| Numpad 7 | Decrease in game Volume |
| Numpad 8 | Mute Volume |
| Numpad 9 | Increase in game Volume |
| Numpad Minus (-) | Display Score (where possible) |
| Home | Decrease 3rd Person Range |
| End | Increase 3rd Person Range |
5. Recording
Now we are ready to record. Please note that we do not record audio. We are going to record sequence per sequence, in another works frag by frag. Its good practice to view your demo head to tails and write down the times you want to start recording. This is where your friends can help you out, view demos and write down the timing of the action. Enough talk, lets record. Double click on your demo you want to record out of, use the timescale controls to skip to forward and drop to normal speed when the action is coming up. Press F1 to start the recording. Press F2 to stop. You will notice the game slowing down during recording, this is normal. Once a sequence has been recorded, hit Numpad 0 to quit.
6. Creating the Clips
Go the screenshot directory we cleaned out earlier and you will see lots of TGA images. Double-click on bmp2avi.exe.

Set the option to TGA, choose a file name and set the frame rate as defined on the movie config. Click 'Create'. You will now be asked to select a video codec. Select the one you like and click 'Ok'. Your screenshots are now being made into a video clip. Once the rendering process has complete, click 'Close'. Delete all screenshots (*.tga) from the screenshot directory, leave bmp2avi and your recorded clip inside. You might want to the clip to a more secure place. Skip back to step 5 and continue doing this until all your parts in the demo have been recorded. Use a video editor such as Adobe Premiere to turn your clips into a decent movie. Good luck and have fun!
If you got any questions or comments, please do e-mail me at [email protected]